
Planning a project using Q-Lite
As with any Quuppa system, the first step is to create a project file using the Quuppa Site Planner (QSP) software that will serve as the plan for how to deploy the system. These instructions will walk you through the steps of deploying a Quuppa system using Q-Lite subscription.
- Check that you have all the required equipment/system:
- Quuppa software version 8.5 or later, for both QSP and QPE. You can download the latest software package from the Quuppa Customer Portal's downloads section.
- Q17 and/or Q35 Locators with firmware upgraded to a version that is compatible with Q-Lite, 8.5 or later (main firmware version 1.99.756 or above)
- Valid Q-Lite subscription
- Create a project plan in the QSP (latest version of 8.5) as you would for any other Quuppa project, i.e. create a new project file, add a background image, modify the tracking area as needed.
- Add Locators to areas you plan to have presence detection
- Mark the locators that you plan to use with Q-Lite subscription in the
project plan by changing the scan mode of the locators.
- In the QSP object tree on the left, select the Locator or Locators that you want to adjust the scan mode for.
- In the object info panel on the right, select the Proximity (RSSI)
for your Scan Mode. Note that the panel for editing a single Locator
looks a bit different to the one for editing multiple Locators.
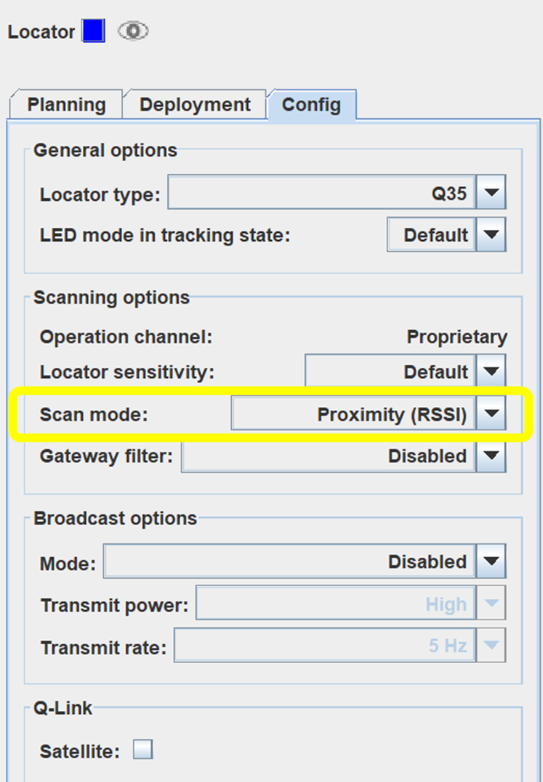
- To adjust a single Locator, go to the Config tab in the object info
panel and select the Proximity (RSSI) for your Scan
Mode from the drop-down menu.
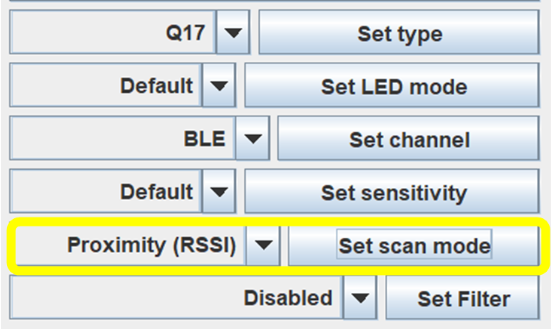
- To adjust multiple Locators simultaneously, select the Proximity
(RSSI) for your Scan Mode from the drop-down menu. To
apply your selection, make sure to click the Set Scan Mode button
next to the drop-down menu.
- To adjust a single Locator, go to the Config tab in the object info
panel and select the Proximity (RSSI) for your Scan
Mode from the drop-down menu.
-
Apply coverage estimate for your project to make sure you have added enough Locators to produce the desired coverage for the tracking area.
-
In the QSP object tree on the left, select the tracking area that you want to use. You can find the tracking area either under the coordinate system or through the tracking area groups.
-
In the object info panel on the right, check the box for Render Coverage Estimate. Make sure that the whole tracking area of Q-Lite should be covered in red.

-
-
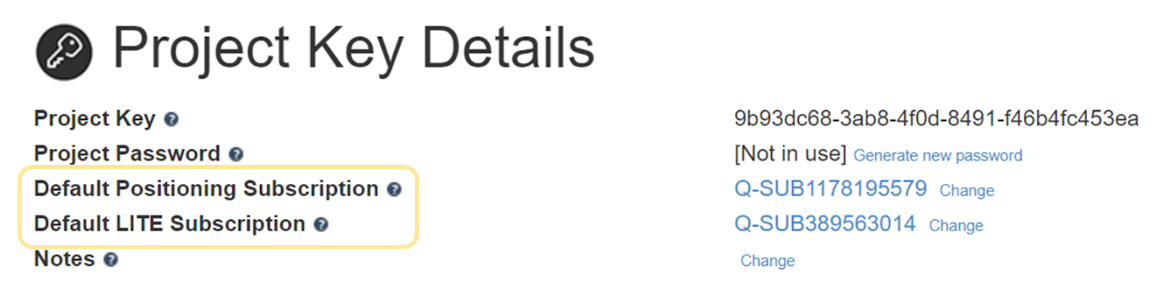
If you plan to deploy a system with different accuracy levels using 2 different subscriptions (e.g. Pro and Lite). Please make sure to set the default subscriptions (Lite & Pro) to the project key in Quuppa Customer Portal (QCP).
When you submit the project, all locators with Proximity (RSSI) settings will get added to Default LITE Subscription. All locators with Positioning(DF) settings will get added to Default Positioning Subscription.
- Save and submit the project.